HATs (Hardware Attached on Top) are the latest thing for the
Raspberry Pi. They are units of circuitry that neatly attach on to the Pi's 40
GPIO pins, which not only give very good mechanical stability, but also allows the relevant pins to be connected. The last
HAT I got was the
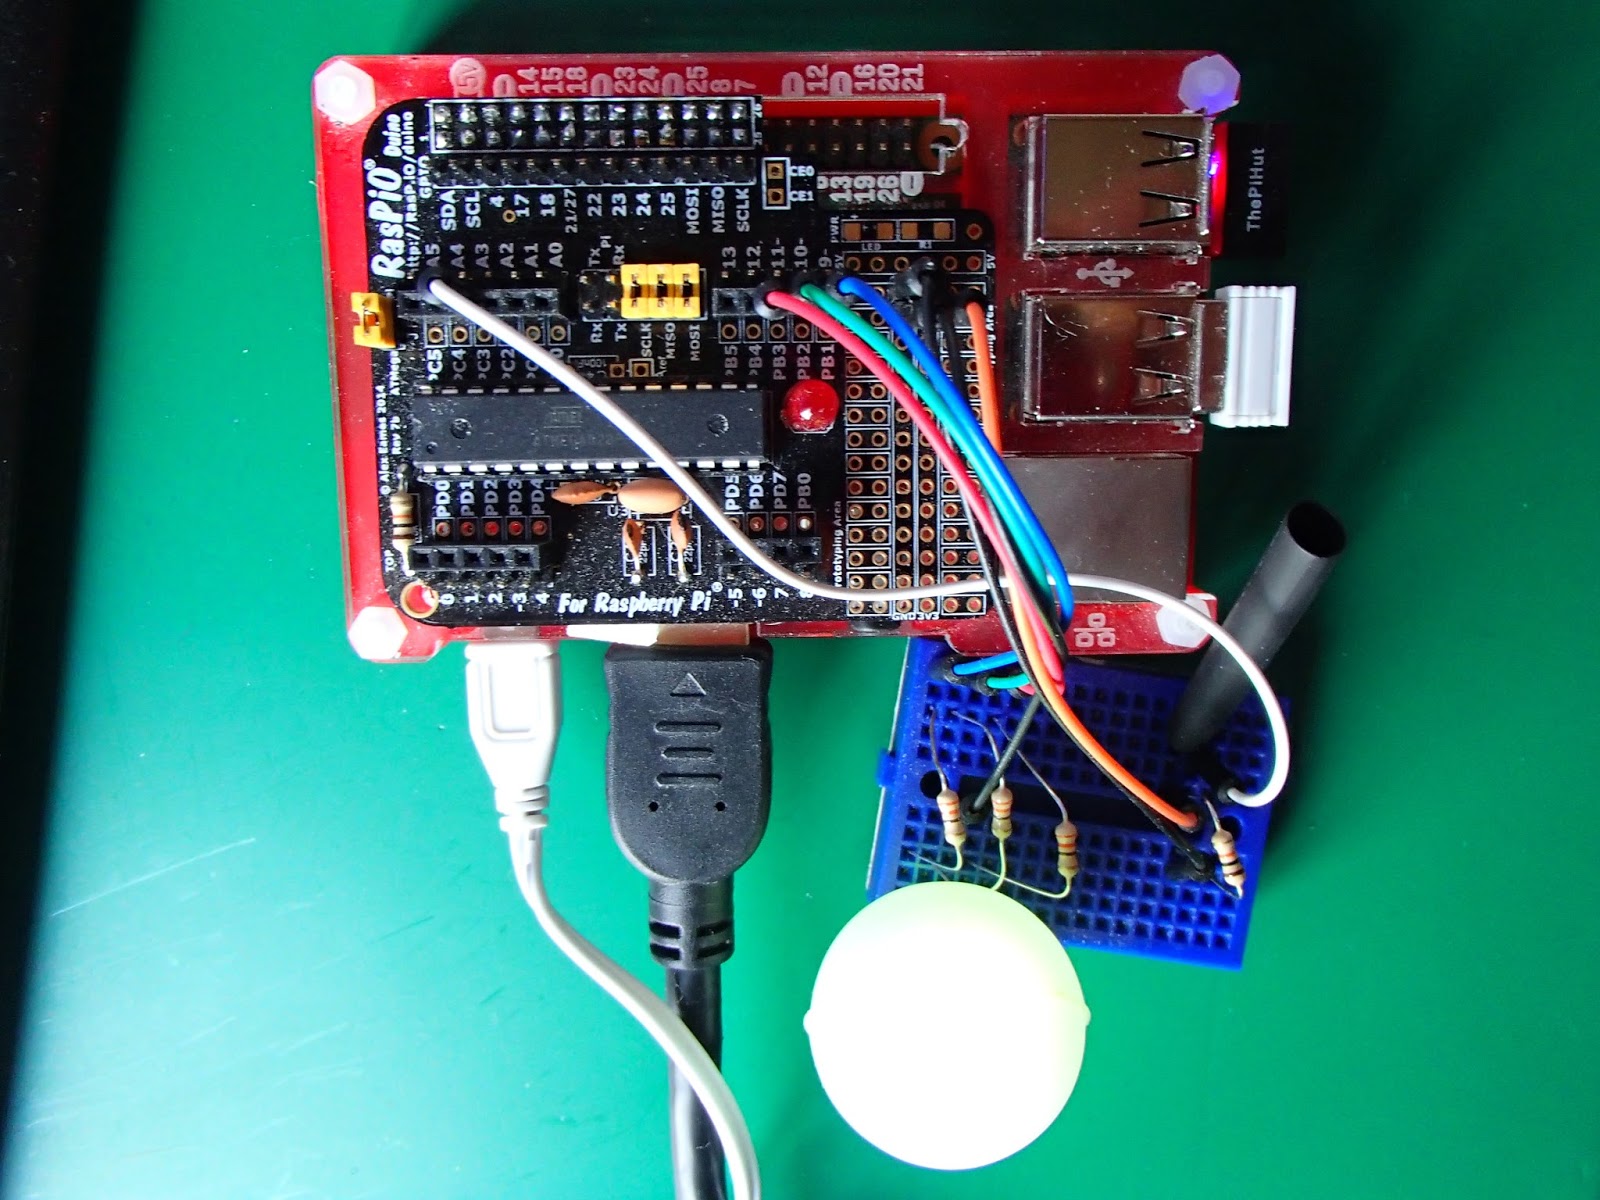
RasPiO Duino by Alex Eames (see
http://rasp.io/). It's a great piece of equipment which came as a kit, but is very easy to solder together. There will be more about that later!
In the meantime, I'm on the learning curve for the
Sense HAT, by the
Raspberry Pi Foundation itself. There's a whole story about this, available
HERE, so I'll not say much more than that it's the heart of the
Astro Pi unit, two of which Tim Peake, UK astronaut, will be taking into space on the
International Space Station at the end of this year. So I just
had to get one! (only £24.50 including delivery).
The
Sense HAT has a number of
goodies as follows:
- a 3DoF (degrees of freedom) Accelerometer, a 3 DoF Gyroscope and a 3 DoF Magnetometer
- a Temperature and Barometric Pressure sensor
- a Relative Humidity and Temperature sensor
- a 5-button miniature joystick
- a slot which allows the Raspberry Pi Camera Board to be connected simultaneously
- an 8 x 8 RGB LED array (nearly 200 LEDs!)
- an Atmel ATTINY88 micro controller unit (not re-programmable)
With the Python API and lots of documentation and code on GitHub, there's a wealth of stuff to be getting on with. The mind just boggles with the possibilities of this machine!
Here's mine mounted on my Pi 2B, with my Raspberry Pi Camera Board also connected:
The Sense Hat mounted on a Pi 2 connected to monitor, WiFi, wireless keyboard and mouse, with the RasPiCam on top
The LEDs are actually displaying a multi-coloured display from rainbow.py. It's difficult to get the exposure right with such bright LEDs - they all come out almost white. There are a number of Python test scripts which can put the various sensors and input/output devices through their paces. Here's a video of my version of the astro_cam.py script running:
The video shows a white square outline surrounded by black, which I made on MS Excel and converted into a jpg. The PiCam "sees" the pattern on my PC monitor, and the software converts it into an 8 x 8 array of pixels, displayed on the 64 RGB LED array, but also on the Pi's monitor, so that I can see what the PiCam sees.
There are a couple of things to note here - firstly the LED array image is not square, but squashed vertically into a rectangle. This must be because of the viewing angle. The other thing to note is that it's the top left of the image that is displayed. This can no doubt be changed in the software. Additionally, the output picture on the Pi's monitor is pulsating. This seems to happen in camera.start_preview() mode, the zoom appearing to vary with each pulse. This could be an explanation of the squashed rectangle LED image, if that is truly what the PiCam sees.
Here's the Python script:
To illustrate the ability of this system to reproduce colour, here is an example where the Raspberry Pi's startup image is reproduced:
As I said before, it's difficult to photograph the coloured LEDs so that the bright colours do not white-out. As viewed by the eye, the colours are much more convincing.
Other scripts I have tried so far include:
colour_cycle.py - this cycles the colours for all the LED pixels at the same time (ie all the same)
conway.py - a simple demonstration of the Conway Game of Life
env.py - this script displays scrolling text showing the environmental readings for example, "Temperature = 36.2. Pressure = 1025.6. Humidity = 32.5"
eyes.py - this is a simple animation of a pair of eyes
orientation.py - gives a contiunous print oyt on the terminal of pitch, roll and yaw of the Sense Hat
press_letter.py - outputs on the LED array, any letter or character entered on the keyboard
pygame_joystick.py - indicates on the LED array, which of the positions the joystick has been moved
rainbow.py - shows a beautiful animation of the colours of the rainbow moving across the array
random_sparkles.py - makes each pixel independently and randomly change colour
rotating_letter.py - makes a letter on the array and rotates it through 90 degree steps
rotation.py - makes an alphanumeric character rotate
shake.py - any movement of the Sense Hat causes an exclamation mark to be displayed on the array
text_scroll.py - makes inverted text scroll on the array
Most of these have been provided by Ben Nuttall of the Raspberry Pi Foundation - thanks Ben!


