Tuesday, March 25, 2014

51. Robotics with PiBot. VI - From the Robot's Point of View

15,000 page views!!
I got the camera working with the PiBot!  I came across a fantastic python library for the RasPiCam, written by Dave Hughes (or is it Davy Jones?) HERE.  This is an extensive and well-documented (see HERE) library called simply picamera, and it allows RasPiCam control to be conveniently incorporated into python programs.

To install picamera, I did the following on the Pi:
$ sudo apt-get install python3-picamera
To update the operating system when new releases of picamera (and other software) are made, use the following:
$ sudo apt-get update && sudo apt-get upgrade
and to update the Raspberry Pi's firmware, use
$ sudo rpi-update
I normally do the last two commands together at regular intervals.  Incidentally, there has recently been a PiCam update, enabling more modes of use of the RasPi Cam.  See HERE

Here's the very first movie attempt:
You can see what the robot sees as it's moving around our dining room floor, trying to avoid obstacles like chair legs, table legs and my feet, using its new ultrasonic guidance system.  There's no microphone on the PiBot yet, so unfortunately you miss the lovely sounds it makes - but they're exactly the same as the last blog post (see HERE).

Here's the code which is simply a modification of the previous program - ie using the ultrasonic transducer to navigate without bashing into obstacles and mangling my SD card:

The picamera library is imported at line 12, the camera object is created at line 39, and line 41 sets the pixel values for the video's resolution.  The camera preview is started at line 42, and it starts recording at line 43, making a video file called foo.h264.  The orientation of the PiCam is such that the image is upside-down when looking forward, so the vertical and horizontal flips are required at lines 44 and 45.  The camera stops recording at line 64 and is shut down at line 65.  Dave's advice is always to use the picamera.PiCamera.close() method on the PiCamera object - as in line 66 - to 'clean up resources'.  And that's it - the video runs for as long as the movement part of the program executes - about 45 seconds at the moment.

This then produces a video file named foo.h264, of the type that we came across in earlier blog posts.  A convenient way of 'wrapping' this file as an .mp4 file is to first go to the directory where the foo.h264 file lives, ie
cd python-spi/bot-command/examples
and use the raspberry pi line command
MP4Box -add filename.h264 filename.mp4

I got this tip from RasPiTV at the following web page: HERE
for which it's necessary to install the gpac package on the RasPi.

Then, to transfer the foo.mp4 file to the PC for playing on any one of a number of movie players, or for uploading to the web, I used the WinSCP program, which I introduced in an earlier blog post (see HERE), running on the PC, and which works just like an FTP program, allowing you to drag 'n drop files from one computer to another.  The foo.mp4 file is 11,322 kB in size.

Here's another video, processed with VideoPad and saved as a .avi file - with music!!:

I must try to get our cat in the picture, some time when she's not sleeping...  
What's next?   I will have to try a bit of panning and tilting!


Thursday, March 20, 2014

50. Robotics with PiBot. V - Decision Making based on Ultrasound

This is hopefully the first in a series of coding exploits where I get to make the PiBot do what I want it to do!

I was so excited that the PiBot actually started doing what I wanted, that I just had to make a video and publish it.  I will replace this one with a better one when I get an improved version.

Here's how the distance sensor works:
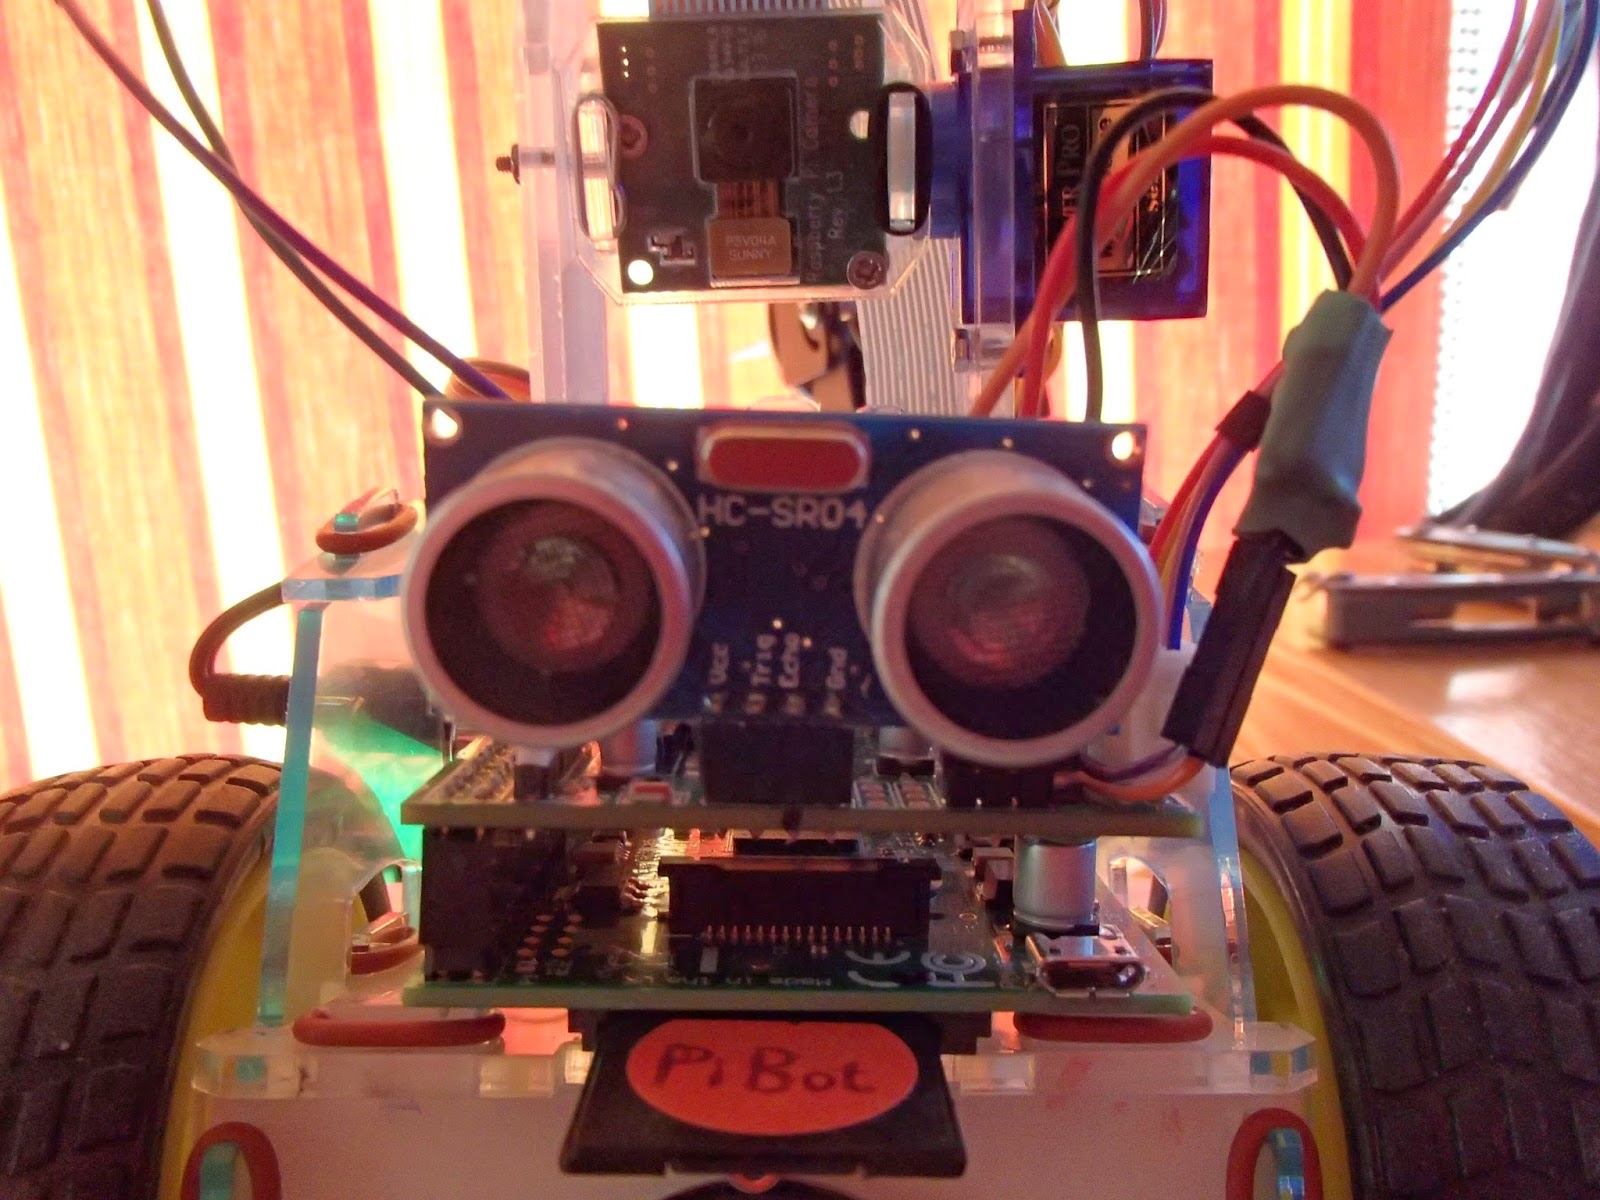
In the above picture, you can see the Elec-Freaks HC-SR04 Ultrasonic Ranging module at the font of the PiBot.  There are two cylindrical eye-like components, the one on the left being the transmitter and the one on the right is the receiver.  Think of these as being a speaker and a microphone respectively.  The transmitter emits sound in a conical shape, ±30 wide:
The specification of the HC-SR04 claims that distances can be measured with an accuracy of up to 3mm from 2cm to 300cm.

There are 4 pins, VccTrigEcho and Gnd.  The timing chart below shows that when a 10µs, 5V pulse is sent to the Trig pin, this initiates a trail of 8 pulses (generated by the piezoelectric crystal, the shiny oblong component between the two 'eyes') allowing the transmitter to emit this signal in a burst of sound pulses.  The pulses are emitted with a frequency of 40kHz, making the duration of each 'high', 400µs.  This frequency is classed as ultrasound as the human ear can only hear frequencies between 20Hz and 20kHz (my personal upper limit is more like 10kHz).  See HERE for a rough test. This train of pulses causes the Echo pin to go from low to high.

The 40kHz sound signal will of course travel at the speed of sound, in a conical shaped beam, and any reflective object in its path will cause the sound to be reflected back towards the HC-SR04.  When the sensor 'eye' detects the reflected sound wave, the Echo pin will return to low.  If there is no object to reflect the sound, the Echo pin will return to low after 38ms.  The time for which the Echo pin is high is an indicator of the distance to the reflective object:
distance  = s.t/2
where s is the velocity of sound in air (343ms-1 or 1234 kmh-1 in dry air at 20C) and t is the TTL (time to live) of the high signal on the Echo pin.  The distance is divided by 2 because the object distance is half of the total round-trip distance covered by the sound pulse.

After the initial 10µs, 5V pulse, we wait for at least 100ms before it is repeated.  The resulting distance can be calculated every 500 milliseconds or so, keeping the PiBot up-to-date on its distance from obstacles in its path.

After struggling with the Python code a bit, and getting some help from the PiBot Team, I finally understand that the bot.getUltrasonicDistance() quantity I was reading was in fact of the data type list. On making my variable dist equal this quantity (making this variable also a list) I then used the first element of the list, dist[0] in the program, which is of the data type int.

Here's the script:

The problem area had been between lines 41 and 53.  This sets up a loop of 300 iterations to read the ultrasound transceiver's distance, and I set it up so that if the distance to any obstacle is 15cm or more, the green lights come on and it's full steam ahead (192, 192).  If the distance is less than 15cm, the red lights come on, and the left hand wheel reverses direction (-192, 192), turning the bot through an angle and away from the obstacle - then it's back to full steam ahead with the green tail lights.

After this loops 300 times (this doesn't take very long), the wheels stop and the blue lights come on, in reverse order, to indicate the end of the movement.

Lines 44 and 45 have been split from one long line which wouldn't all fit into the width allowed above.  This combined statement removes the square brackets which were enclosing the value of distance displayed on the terminal, by converting dist[0] to a string, and using the string method .replace to change firstly the [ to a space, and then the ] to a space.

The time.sleep(0.1) statement is quite important as it regulates the speed at which things happen within the loop, in this case, it introduces a delay of 0.1 seconds each time.

And - it works!  So now my SD card won't be getting as much of a bashing as it was!

Wednesday, March 12, 2014

49. Robotics with PiBot. IV - The PiCam Assembly

13,000 page views!!
You may remember a few blog posts back, I had been advised to skip assembly of Parts 6 and 7 of the PiBot kit, to allow any problems there may have been with the PiBot so far, to be attended to.

Here are the bits:
Part 6. The stepper motor (to pan the PiCam)
Part 7. The servo (to tilt the PiCam)
I started assembling these, without any instructions, but after a bit of head scratching, I managed to get to the following stage:
Part 6. Stepper assembly (to pan the PiCam)
Part 6. The stepper motor underneath
Then Part 7:
Part 7. Servo tilting assembly (with PiCam)
Part 7. View of the servo
Now the combined assembly mounted on PiBot (I had to extend the power and GND wires to the voltage regulator to get the PiCam's ribbon cable connected to the Pi):
PiBot with full PiCam assembly and PiCam
Rear view of PiBot
And here's the test_pibot_hardware.py program running:
You can see the previous functions going through their paces - wheel motors turning, neopixels illuminating, and the ultrasound transducer working as usual, and in addition, the stepper motor is turning and the servo is rotating.  

Brilliant!  We're another step forward!!